Camera bags feel like a constantly revolving door in my house. Over the years, I’ve been through many more camera bags than I ever intended. And it’s something that happens to everyone — as the amount of gear you have changed, you’ll always find yourself in need of more space or different features.
So, you’re in the right place if you’re currently asking how to find the right camera bag for you. There is no one-size-fits-all camera bag that is perfect for everyone. But I can give you some clues where to start looking based on my own experience.
Finding how big a bag you need takes time, and for the most part, many photographers will need a different sized bag for different purposes.
If you’re a videographer who is traveling a lot by plane, chances are you will want to use a camera roller bag that is easier to travel with.
Landscape photographers who find themselves hiking through the backcountry will want a good shoulder bag that is able to carry the equipment, and hopefully, disperse some of the weight around the hips instead of the shoulders.
And people traveling through the city might just be happier with even smaller sling bags that only carry a camera, a snack, and maybe two lenses.
In the end, I’ve been able to whittle down my camera bag collection to just one main good quality camera bag. Even if I’m not carrying it fully, my camera gear is always inside that one. It’s just such a perfect bag for everything that I’m never without it. So here are the top 10 features that are needed in a camera bag that you’ll use to hike or travel with.

1. A strap told your tripod
Most tripods are too big to fit in your camera bag. If you don’t have space to hold your tripod on your bag, you’ll have to carry it up the side of the mountain by hand. And while that might take a bit of weight off the bag, you’ll very quickly get tired of it.
A good camera bag will have a strap off the left or right-hand side that’ll hold your tripod for you. Although many smaller sling bags and messenger bags aren’t designed for taking tripods into the field.
If you are a landscape photographer who needs a tripod, I highly recommend getting a slightly larger bag to accommodate the use of a tripod.

2. Some form of waterproofing
Whether it’s a waterproof shell that you can put on, or waterproof zippers and casing, having a form of waterproofing on your camera bag will be helpful if you ever get caught in a storm in the backcountry. The last thing you want is for your expensive camera gear to get wet on a long hike where there’s no way to dry them off.
Man camera shoulder bags do come with a waterproof shell, which is great for small amounts of rain. If you are often taking your camera bags out into the backcountry, I highly recommend getting one that is made with waterproof zippers.
Sometimes a bit of water can leak through a shell that you have to put on your bag when it rains. The shells are a great addition to many bags, but if it falls off, or has an unexpected leak, it can become disastrous without you ever knowing.

3. Water bottle pocket on the outside
You’ll need to rehydrate on long hikes, and storing a water bottle inside a bag is just asking for it to leak all over your expensive gear.
The other problem is that if your water bottle is inside the bag, you will have to take a break to have a drink or refill. While that is good for some people, it’s an extra hassle that can be avoided.
4. Adjustable interior spaces
Your camera gear is going to change all the time. That means the right bag will be one that can adapt to those changes so it doesn’t end up collecting dust.
Many camera backpacks have adjustable dividers and padding can be adjusted with velcro to fit and protect your gear as you evolve to owning additional lenses and camera bodies. These bags are incredibly versatile, and ensure gear isn’t banging into each other each time you take a step.
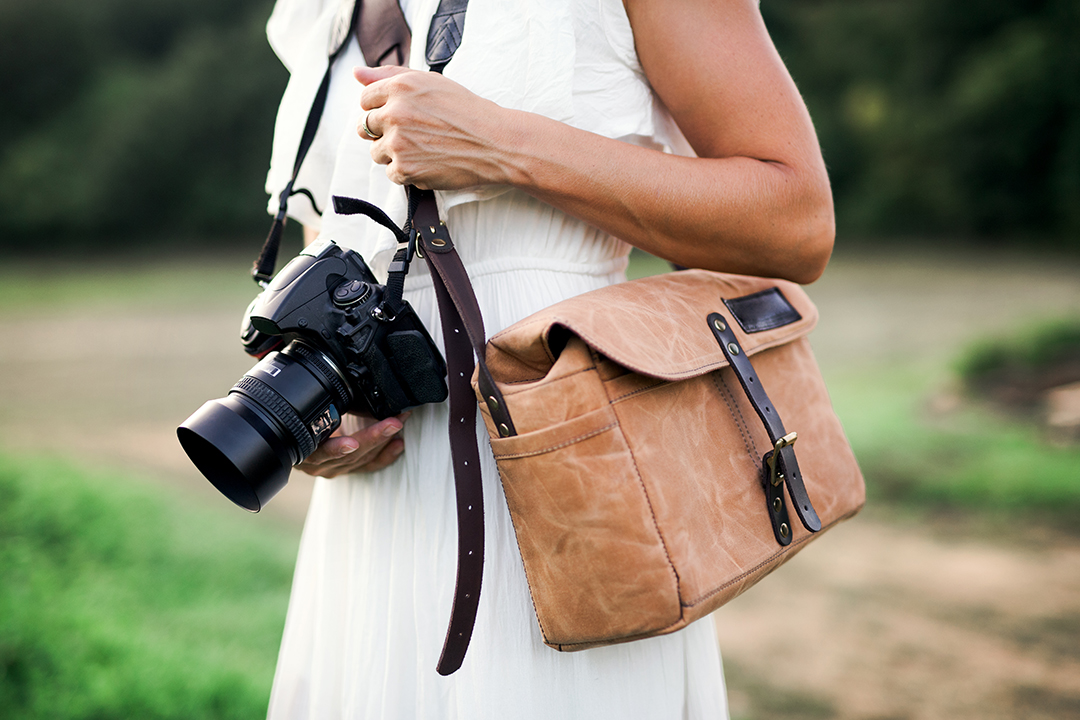
5. A bag that doesn’t look like a camera bag (for travel)
If you’re traveling, one of the worst things you can do is announce from afar that you have $10,000 worth of camera gear in your backpack. If you are traveling via airplane, it’s always a good idea to look into roller bags that will be easier to take on long walks through airports and city streets.
And if you want to carry on the plane instead of chancing it in the checked baggage compartment, be sure to measure it to fit in the overhead compartment. Most airlines won’t weigh your bag before entering the airplane (unless they see you struggling to carry it at the gate). So you should have no problem getting them on the flight.
Find a camera bag that looks as normal as possible. Lowepro has made a number of bags recently that look fairly normal, or have zippers on the backside so that they can’t be opened while strapped to you.
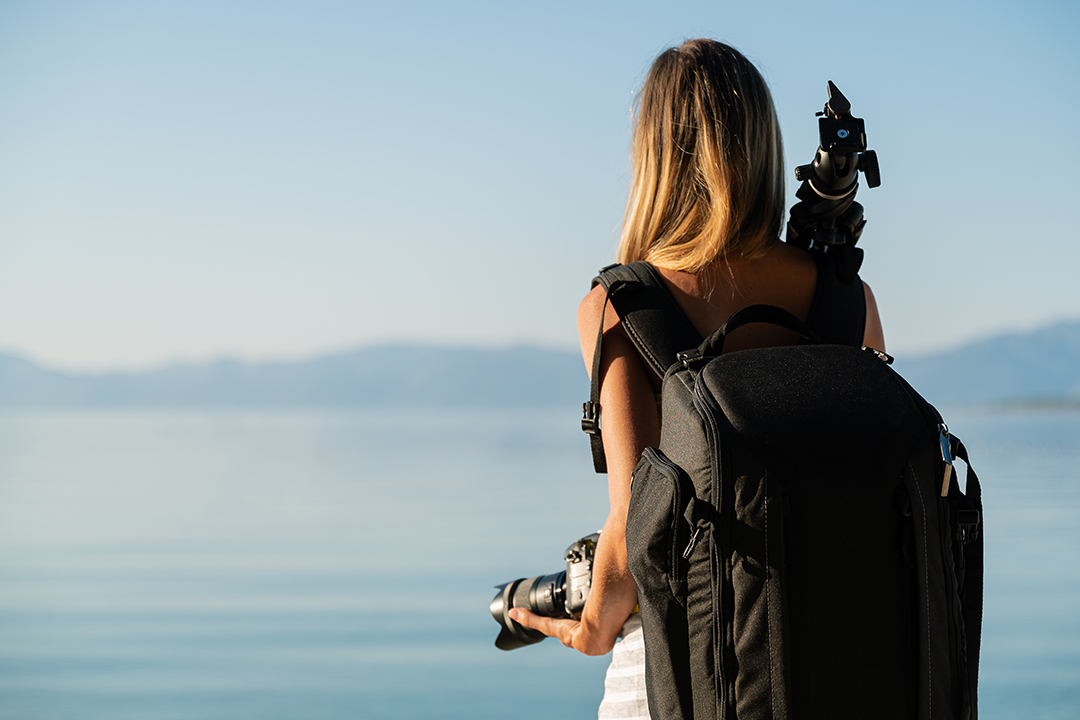
6. A Waist Strap to Distribute Weight
If you’re using professional gear, you’re going to need an ergonomic bag that’s meant for long hauls.
That’ll mean having a strap around the waist to help take some of the stress off your shoulders and lower back. You won’t notice it as much at first, but halfway up a hike, not having that strap will become very apparent.
There are plenty of bags that come with a chest strap. And while that helps, they’re not as useful as the ones that go around your waist. The problem is that the bag won’t be distributing the weight onto your hips, where it’ll have the most support and power to get through a hike. If you’re carrying lighter equipment, it may not be a problem to use a bag with chest straps. But as soon as you throw in a tripod, and a heavy lens like a 70-200mm f/4, you’ll start to notice the difference.

7. Space at the top for snacks, clothing, and others.
If you’re hiking with camera gear, you won’t be able to carry another bag. So you’ll need a bag with at least one extra pocket on the top with enough room to carry snacks, a rain shell, extra clothing, other accessories, and a first aid kit.
Without an extra, non-camera-related pocket, these extras will have to fight with your camera gear for space in the bag, and no matter which side wins, you’ll lose something. Whether that’s an extra lens or a first aid kit, you’ll feel that loss at one point or another.

8. Back opening design
This is the first thing that I look at when purchasing a new bag. I got sick of putting my bag on the wet ground, getting my camera out, and then putting the wet, dirty part of the bag onto my back. Because when you inevitably get back to the car, if you don’t have another layer to change into, that dirty jacket is now pressed up against the seat and just gets everywhere.
All of this can be solved by just getting a bag that opens in the back. That way, you put the front of your bag on the ground first. It doesn’t look as pretty to the hikers behind you, but this is about saving your clothing and car seats. And I think that’s much more important in the long run.

9. Space for a laptop
If you’re taking the bag hiking, you’re not going to use this feature. But if you’re like me, who has to bring a laptop for meetings with clients when I’m selling work, or when traveling with camera gear, then you’ll want a laptop holder inside your bag. These are incredibly convenient, and if your laptop isn’t in the bag, they don’t take up any additional space, or add weight.
The laptop pound has made my camera bag so much more user-friendly. It also makes traveling through security at airports a breeze. These laptop pouches make it possible to easily take your laptop out of the bag to go through the scanners.

10. Extra pockets on straps
Having easy-access pockets on the straps can make a bag so much more convenient. I use pockets like this to store my cell phone, hold my sunglasses, and carry a pocket knife. Taking off the bag and digging through it to find these things takes up precious time and energy that I’d rather spend on the hike itself.
I know there’s been a few cases where I took the wrong trail because I just didn’t want to dig my phone out of my backpack. It sounds lazy, but when you are on a relentless uphill climb for four hours with 30lbs of gear on your back, you’ll understand.

Photography Academy Camera Bag Recommendations
These are the top three camera bags that we recommend for all of our photographers. Over the years we have tried many different models and these ones have consistently come on top for our needs when we’re out taking landscape photos on location.
It’s always a good idea to have a couple of different bags ready to go. Some days you may need a full, versatile camera backpack with straps to spread the weight of all of your photography gear and camera accessories for a big trip. Other times, all you want is a single camera, a good all-around lens, and maybe a small bottle of water, an extra battery, and SD card. When that happens, a small sling bag is a perfect fit.

Think Tank TurnStyle Sling 10V2 (Find it on B&H). A solid sling bag that can carry a small amount of equipment, including a pro camera with a small lens or two. It’s perfect for carrying a small amount of gear, and the sling style makes it easy to take out your camera without having to put down the bag. The front pouch can also store small accessories or daily needs.

Manfrotto Street Backpack (find it on B&H). This discreet camera backpack has the space to do everything you need in a single backpack, including space to hang a tripod off the side, store a laptop, and other goods. Best of all, it doesn’t look like a typical camera bag, so it won’t attract a lot of attention (until you hang a tripod on the side, of course). This bag is great for day trips where you’ll need more than just your camera gear, but this bag won’t be the best for long hikes. Being built by Manfrotto, you know it’s going to be a good, dependable camera bag long-term.
The best camera bag for hiking with heavy gear

Shimoda Designs Explore 60 backpack (Find it on B&H here).
This camera backpack is built to carry the weight on a long walk or hike. The shoulder backpack is modular with plenty of padded dividers to protect your expensive gear in the main compartment. This bag carries more stuff, and with the wide-padded waist belt, it will distribute the load to your waist.
This is a good quality bag that also has plenty of room for peripherals, including a 13” laptop, and other hiking necessities, like water, snacks, and extra clothing. The camera bag also has a nylon shell, making it water-resistant so your gear doesn’t get wet when caught in a sudden deluge.
60 stands for 60L size, including the expandable top so you can stuff a jacket, snacks, and a first aid kit inside. This bag also fits in the overhead bin in larger airplanes, but won’t fit in the overhead bins of small, propeller-driven planes.
Just note, the padded dividers don’t come with this bag. You will have to purchase the ones your need separately. I learned this the hard way, and bought it just before an upcoming trip, only to find out that I didn’t have the adjustable padding that I’d needed in time.

Lowepro Powder: (Find it on B&H Here). Cheaper alternative. The shoulder bag itself is not waterproof, but it comes with a waterproof pack cover and has a back-opening design so that your back doesn’t get wet when you put the bag back on. This bag is lightweight and perfectly suited to longer hikes, with plenty of space for water, food, and some extra clothing.
Where can I learn more about photography?
 Getting the right backpack is just one part of every photographer’s journey. But technique matters more than anything else. When you’re ready to learn more about how to plan and take incredible photographs with the camera you already own, come and take my free web class! Here you’ll learn about the four-step system that has helped me take award-winning fine-art landscape photographs. Sign up today!


